A MESSAGE FROM PEGGY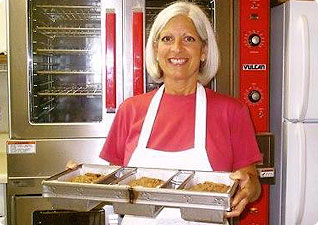
Seems lots of folks, me included, have jumped on the sourdough bread bandwagon. I’m so glad I did! I’ve had great fun the last couple of months experimenting with sourdough starters and breads. The taste and texture can’t be matched. Some of my breads have turned out beautiful, others not so handsome but still the best tasting bread I’ve ever eaten. I’m sharing one of my “free birding” sourdough bread recipes with you this month.
A few weeks ago I received a message from Traci Sellers on our Facebook page about her years of baking with sprouted flours so I asked her for some tips for everybody to make their sprouted breads the best they can be. I think you’ll find Traci’s baking tips helpful in your sprouted flour endeavors. Traci has a recipe book – Traci’s Transformational Kitchen Recipe Collection (www.bestfoodist.com) filled with delicious dishes and loads of sprouted flour recipes. While I promote a traditional diet filled with nutrient–dense fare including lots of fats and proteins, Traci’s vegan dishes would make great accompaniments to any meat entree.
I’ve also included a delicious waffle recipe sent to me by a customer. It’s a great recipe sure to please, especially on one of those rare, lazy Saturday or Sunday mornings when you don’t have a list of things to accomplish or deadlines to meet!
Back to top


You can save some money on your next To Your Health sprouted flour order. We’ve been able to reconfigure some of our shipping and handling charges and are passing those savings on to you!
Back to top

Back to top
Traci’s Sprouted Flour Baking Tips
www.bestfoodist.com
Hi Peggy! I would be happy to share some tips! I have been working with sprouted grains for over 10 years now and have a few tricks up my sleeve.
Sprouted grain dough tends to be a lot stickier than traditional dough, and giving in to the temptation to add extra flour to cut the stickiness results in a heavier denser loaf. If you want your sprouted loaves to be lighter, stop mixing when the dough is still sticky, and oil up your hands and the counter and knead with the oil instead of flouring everything. This also saves on those extra bits of precious flour!
It is important to allow for a shorter raise time on sprouted breads because they rise faster than traditional 100% whole grain breads (and when a sprouted loaf falls, it craters royally!). I usually allow 20 to 30 minutes for my loaves to double in size, and when the oven heat hits them, they poof even more! I attribute this to the fact that the sprouting process frees up the natural sugars found in grain, which not only makes it sweeter, it is like ambrosia for your yeast, resulting in a quicker raise.
I prefer an “oven raise” for sprouted loaves. I preheat the oven to 170 degrees, turn it off and put oil topped loaves in to raise with the door shut (You can also give loaves a light spritz of non-stick olive oil spray if you prefer not to add extra oil). When I am ready to bake, I simply turn the oven on!
Avoid the temptation to over knead sprouted breads, especially if machine kneading. I have actually had over kneaded dough break down into a sludge when moments before it was kneading happily.
Sprouted flour more closely substitutes for white flour than whole wheat. If you are converting a white flour recipe, sub equal amounts; if your recipe calls for whole wheat flour, remove 1–2 tablespoons per cup.

Back to top
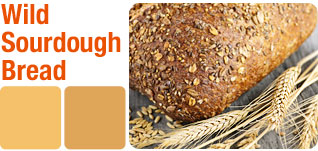
Starter – 2 cups of sprouted rye flour mixed with 2 cups of filtered water. You want to use non–chlorinated, non–florinated water (reverse osmosis), but not dead water (distilled). Mix well in a large bowl (needs to hold at least 1 gallon), cover with a thin tea towel or cheesecloth and place on your back porch, balcony or some other safe place outdoors. Leave for 24 hours. Bring your starter in, pour it into a clean bowl (same size) and add 1 cup of sprouted rye flour and 1 cup of filtered water. Cover and outdoors it goes again. Repeat the transferring to a clean bowl and feeding process for at least 5 days, but up to 7 days (I fed my first starter for 7 days, my subsequent starter for 5 days). Your starter will begin to bubble between days 2–3 and take on a pleasing wine aroma by day 5–6.
You can also make your starter with sprouted wheat or spelt flour. I discovered that my wheat starter was not quite as active as my rye starter and I haven’t tried spelt yet.
Bread – A recipe is a guideline at best for me so I haven’t really measured how much flour I’ve used in a recipe yet. I promise to get better at this because I know many of you like to be precise.
Remove a pint of your starter (You can start the feeding process over at this point by adding 1 cup each of flour and filtered water to the pint of starter, or you can put the pint of starter in the refrigerator until you get ready to feed it again for further bread making). Place the remainder of starter in a clean bowl. Add 1 cup of filtered water to it, 5–7 cups of sprouted flour (I use sprouted wheat flour) and 2 tablespoons of salt. Mix until your dough is thick enough to get your hands in it and knead for 7–10 minutes. Your dough should not be too thick so after adding 4 cups of flour, add your remaining flour a ¼ cup at a time. Once your dough has been kneaded enough it will take on an elasticity. It will not be as glossy as a regular flour bread dough, but the elasticity will be evident.
Let your dough rest for about 5–10 minutes. Cut it into 2 pieces and shape it to fit 2 buttered bread pans (I use ceramic breads pans by Emile Henry). Brush tops with olive oil, cover pans loosely with plastic wrap and allow to rise (I usually leave overnight for convenience, but the rising process may take only
4-6 hours depending on the temperature in your home).
Preheat your oven to 350 degrees for at least 30 minutes before baking. Place your pans on a granite or pizza stone in the bottom of your oven, or place on a rack in the lowest position of your oven, and bake for about 1 hour. Remove bread from pans immediately after taking them from your oven. Let loaves cool on cooling rack before slicing.
Back to top
|