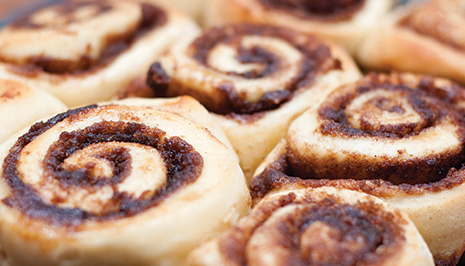
Yeast Breads and Sweet Rolls
 A big challenge in gluten-free baking is making yeast breads. Without gluten to support the structure, they can end up very dense. Gluten free sweet rolls are often either dry or gummy. But, by using a few simple techniques, you can make gluten-free yeast breads and sweet rolls that you will be proud to serve.
Smaller loaves are better when it comes to baking gluten-free yeast breads. Without gluten, a large loaf is more likely to collapse during baking or fall in the center after coming out of the oven. The larger pan also holds more dough, which makes it harder for the yeast to lift the center of the dough, often resulting in a heavier denser, underbaked bread loaf.
If you have trouble with a loaf of bread falling or if the bread is gummy in the center, it likely means there is too much liquid in the batter. Try using 2-4 tablespoons less liquid in the batter. Try using 2-4 tablespoons less liquid next time you bake the bread. If the bread is cooked through but very moist in the center, try reducing the amount of xanthan gum. Baking gluten-free yeast bread is not an exact science and can take some practice to master, but it is a lot of fun and the journey is well worth the effort.
Quick Breads
- Makes sure the oven is at the correct temperature before combining the liquid and dry ingredients.
- Position the oven rack in the center of the oven for good air and heat circulation and even naking
- Quick breads rise better in small, narrow pans.
- Dark-colored bread pans can cause the side and bottom of the load to be dark.
- Fill bread pans two-thirds to three-quarters full with batter for a good rise.
- Immediately remove the bread from the pan after baking to keep the bottom from becoming soggy.
- Cook quick bread loaves on their sides on a wire rack to help the loaf maintain its shape.
- Cook quick breads thoroughly to make slicing easier.
- To help keep quick breads moist and fresh after they are cool, wrap cooled loaves tightly in plastic wrap.
Muffins
- Make sure the oven is on the correct temperature before combining the liquid and dry ingredients.
- Grease the muffin cups well with unsalted butter to prevent sticking
- Thick muffin batters rise up higher and produce taller muffins than thin batters
- A large spoon comes in handy to quickly and easily transfer muffin batter into the muffin pan.
- Fill the muffin cups nearly full and slightly mound the batter in the center.
- Immediately remove the muffins from the pan after baking to prevent the muffins from becoming soggy
- To easily remove baked muffins from the pan, quickly turn the pan upside-down over a clean towel. Give the pan a light tap on the bottom or a quick shake.
- Cool muffins on their sides on wire racks to keep shape.
More Sourdough Bread Tips
- I’ve found that Sally Fallon’s sourdough starter recipe in Nourishing Traditions works best and gives me great bread results.
- Sprouted rye flour makes the liveliest sourdough starter and the highest rising loaves. I grow my starter on the back porch, not inside.
- I mix sprouted wheat or spelt flour with my starter to get a great tasting bread.
- No need to knead your sprouted dough for too long. 4–5 minutes is sufficient as long as you’ve obtained a nice even texture to your dough.
- After adding 3 cups of flour to your starter (about 3 quarts), add flour ½ cup at a time until you get the texture you like. A little on the sticky side is best and will give you a wonderfully textured loaf.
Loaf Pans
Heavy–gauge aluminum… the best conductor of heat for baking, since the material responds quickly to changes in heat. The gauge, or thickness, of the pans determines their efficiency in reflecting heat. A professional heavy–weight aluminum pan is less likely to warp or develop hot spots; look for an industrial – strength brand like Chicago Metallic. …avoid stainless steel, as it does not efficiently conduct heat. Pyrex glass loaf pans are nonreactive and good conductors of heat, and brown loaves faster than aluminum. Remember to lower the oven temperature by 25 degrees when using glass pans; they absorb heat quickly. …need to be greased heavily to prevent sticking. They bake best when place don the center rack of the oven. Ceramic loaf pans …they are heavy and slow, steady conductors of heat. Avoid sugary doughs, which stick to porous clay. Always place clay pans on the lowest oven rack for the bottom of the loaves to brown properly.
Baking Sheets
Look for baking sheets of the heaviest gauge aluminum or tin–plated steel, which don’t warp. Be sure the baking sheets are heavy duty; thin jelly–roll pans will buckle in the high heat of the oven. Perforated baking sheets and those with dark finishes, such as the Calphalon brand, are great for crusty country breads.
Taken from: Bread Made Easy: A Baker's First Bread Book, by Beth Hensperger.
Easy to make Sprouted Bread Crumbs and Crouton
For sprouted bread crumbs slice sprouted bread (any bread will do) and place slices on a baking sheet. Place in a pre-heated 350° oven for 15-20 minutes (don't let slices get too brown). Turn the slices and toast for another 15-20 minutes. Remove pan from oven and let toasted slices cool. Break into pieces in a food processor and pulse until you have a smooth batch of crumbs.
For sprouted croutons cut sprouted bread into 1/2-inch cubes. Toss in melted butter to coat. Spread evenly on a parchment-lined baking sheet. Place in pre-heated 350° oven and toast for 15-20 minutes. Stir the cubes to turn and continue toasting for another 15-20 minutes watching to prevent over browning. Let croutons cool and store in zip lock bag on counter. Will stay fresh for several days.

 334-584-7875

